Tips for Cleaning Partial Dentures

Daily Cleaning Routine for Partial Dentures


Rinsing After Meals


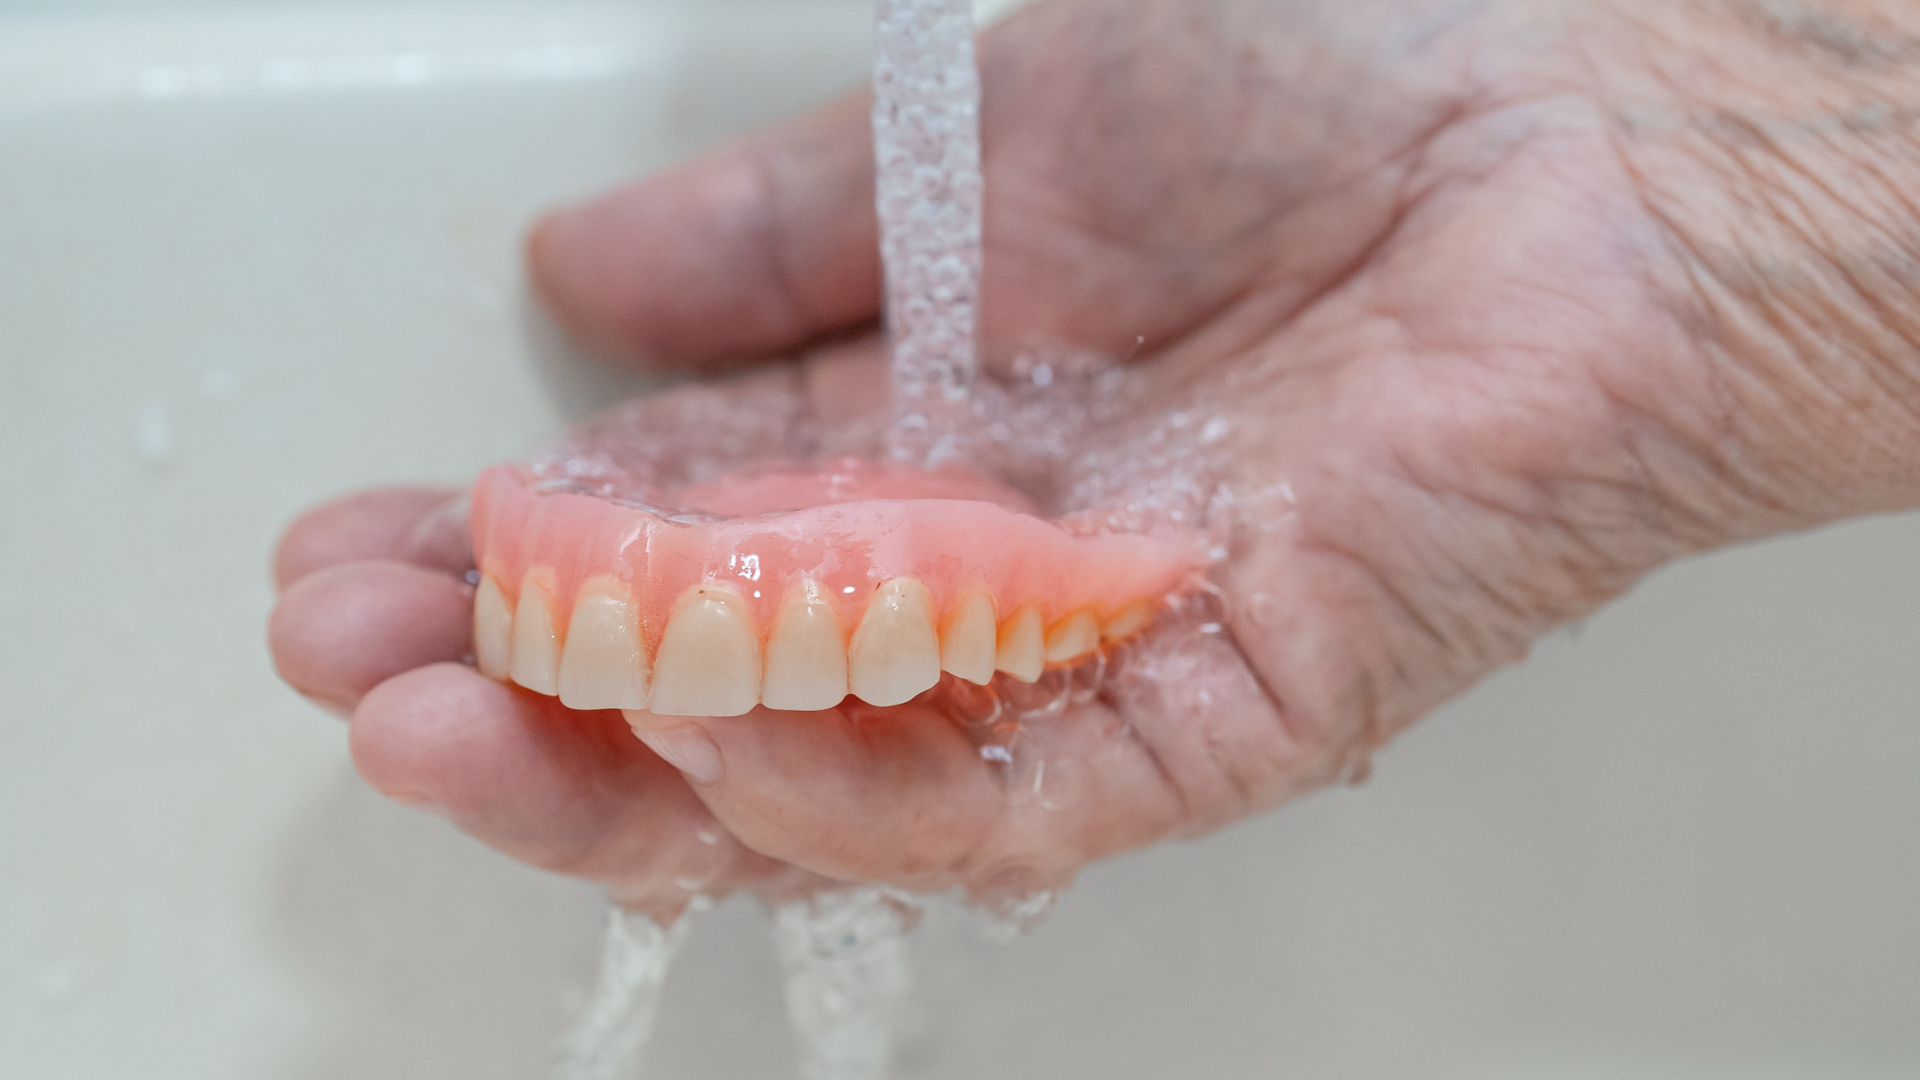
Maintaining the cleanliness of your partial dentures after each meal is essential for oral hygiene and denture longevity. Rinsing your dentures immediately after eating can help remove food particles and prevent the accumulation of bacteria.


  • Remove your dentures carefully from your mouth.
  • Hold them under running water, gently dislodging any food particles.
  • Ensure the water is not too hot, as extreme temperatures can warp dentures.


By incorporating this simple step into your daily routine, you can significantly reduce the risk of stains and oral infections associated with food debris on your dentures.


Brushing with Unscented Soapy Water


Maintaining the cleanliness of your partial dentures is essential for both hygiene and comfort. Brushing your dentures daily with unscented soapy water is a gentle yet effective way to remove food particles and plaque without causing damage to the denture material.


Follow these steps for optimal cleaning:


  • Remove your dentures from your mouth.
  • Rinse them under warm running water to wash away loose food particles.
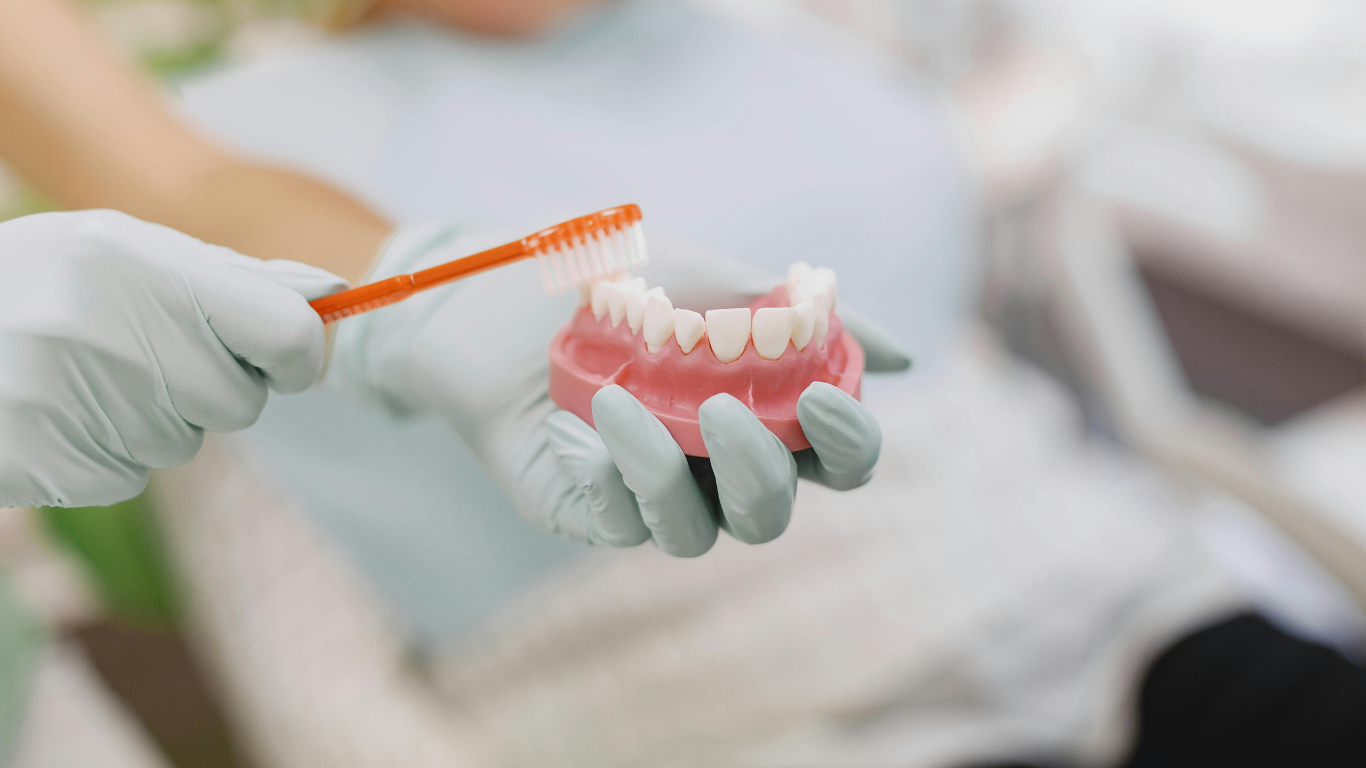
  • Apply a small amount of unscented, mild dish soap to a soft-bristle denture brush.
  • Gently brush all surfaces of the dentures, paying extra attention to any grooves or crevices where bacteria may accumulate.
  • Rinse the dentures thoroughly under warm water to remove all soap residue.


Remember, using scented soaps or strong detergents can leave a taste behind and may cause irritation, so it's important to stick to unscented options.


After brushing, ensure your dentures are completely clean and free from any soap before placing them back in your mouth or soaking them in a cleaning solution. This routine not only contributes to the longevity of your dentures but also to the overall health of your mouth.


Soaking in Denture Cleaning Solutions


Soaking your partial dentures in a cleaning solution is an essential step in maintaining their cleanliness and longevity. Always follow the manufacturer's instructions when using these solutions to ensure that you do not damage your dentures.


  • After brushing, place your dentures in a denture cleaning solution to help remove any remaining debris and bacteria.
  • Use only recommended solutions, as some products can harm the denture materials.
  • Soak them overnight, or for the time specified by the cleaning solution.


Regular soaking not only cleans your dentures but also keeps them moist, which helps maintain their shape and fit.


Remember to thoroughly rinse your dentures after soaking to remove any residual cleaning solution before placing them back in your mouth. This step is crucial to avoid ingesting any harmful chemicals.
Deep Cleaning and Stain Removal


Monthly Vinegar Soak


In addition to the monthly vinegar soak, incorporating denture-specific cleaning tablets into your routine can further enhance the cleanliness of your partial dentures. These tablets are formulated to remove tough stains and bacteria, ensuring your dentures remain hygienic and odor-free.


  • Begin by rinsing your dentures under warm water to remove any loose particles.
  • Drop one cleaning tablet into a glass of warm water and fully submerge your dentures.
  • Allow the dentures to soak for the time specified by the product instructions, usually 15 minutes to overnight.
  • After soaking, rinse the dentures thoroughly under running water before placing them back in your mouth.


Regular use of cleaning tablets can prevent plaque buildup and keep your dentures looking and feeling like new. It's a simple step that can make a significant difference in your oral appliance's longevity and your overall oral health.


Using Denture-Specific Cleaning Tablets


Incorporating denture-specific cleaning tablets into your cleaning regimen can significantly enhance the hygiene and longevity of your partial dentures. These tablets are formulated to effectively remove plaque, stains, and bacteria without damaging the denture material.


  • Begin by rinsing your dentures to remove any loose particles.
  • Fill a container with enough warm water to cover the dentures and drop in the recommended number of cleaning tablets.
  • Allow the dentures to soak according to the package instructions, usually around 15 minutes.
  • After soaking, rinse the dentures under running water to wash away any remaining cleaning solution.


It's important to use these tablets as directed to avoid over-soaking, which could potentially alter the fit of your dentures.


Regular use of cleaning tablets can help maintain the appearance and function of your partial dentures, ensuring they remain a comfortable and effective solution for your dental needs.


Professional Cleaning Services


While regular home care is essential for maintaining your partial dentures, professional cleaning services offer a deeper level of cleanliness that can't be achieved at home. These services use specialized tools and solutions to meticulously remove plaque, tartar, and stubborn stains, ensuring your dentures remain in optimal condition.


Professional cleanings are recommended at least once a year, or as advised by your dental professional. This routine care can help extend the life of your dentures and maintain your oral health.


When considering professional cleaning, it's important to choose a reputable dental service provider. Here's a checklist to help you select the right service:


  • Verify the credentials and experience of the dental practitioner.
  • Ensure the clinic follows up-to-date sterilization and cleaning protocols.
  • Ask about the types of cleaning agents and equipment used.
  • Inquire about the cost and whether it is covered by your dental insurance.
  • Check for customer reviews or testimonials to gauge service quality.


Remember, professional cleaning is an investment in the longevity of your partial dentures and the health of your mouth.


Maintaining Oral Health with Partial Dentures


Caring for Natural Teeth


While partial dentures play a crucial role in maintaining the aesthetics and functionality of your smile, it's vital not to neglect the health of your natural teeth. Brushing twice a day with fluoride toothpaste and flossing daily are foundational steps in preventing tooth decay and gum disease.


Regular dental check-ups are essential to monitor the health of your natural teeth and the condition of your partial dentures. These visits allow for early detection of potential issues and adjustments to your dentures if needed.


Maintaining a balanced diet is also important for oral health. Limiting sugary snacks and acidic drinks can help protect your natural teeth from decay and erosion. Here's a simple list to keep in mind:


  • Brush with fluoride toothpaste twice a day
  • Floss daily to remove plaque and food particles
  • Limit intake of sugary and acidic foods and beverages
  • Schedule regular dental check-ups for professional cleaning and examination


Ensuring Proper Fit to Avoid Irritation


Ensuring that your partial dentures fit correctly is not only a matter of comfort but also of oral health. A poorly fitted denture can cause irritation, sores, and even infection. Regular check-ups with your dental professional are essential to adjust the fit as needed.


  • Visit your dentist regularly for adjustments.
  • Be alert to changes in fit due to natural changes in your mouth structure.
  • Report any discomfort or sores immediately to your dentist.


It's important to address any fit issues promptly to prevent more serious complications. Remember, your mouth's shape can change over time, which may necessitate adjustments to your partial dentures. Keeping up with these adjustments will help maintain your comfort and oral health.


Nightly Removal to Rest Gums


Ensuring that your partial dentures are properly handled and stored is essential for their longevity and your oral health. Nightly removal of dentures is recommended to allow your gums to rest and recover from the pressure and friction experienced throughout the day. This practice not only helps in maintaining the health of your gums but also contributes to the overall hygiene of your dentures.


When removing your dentures at night, it is important to store them correctly to prevent warping and to keep them moist. Placing them in water or a mild denture-soaking solution can prevent them from drying out and changing shape.


For those seeking professional advice on denture care, the best dentist in Midland TX can provide personalized recommendations. Regular check-ups ensure that your dentures fit correctly and function as intended, which is crucial for your comfort and oral health.


Handling and Storage Best Practices


Safe Removal and Placement Techniques


Proper handling of partial dentures is essential to ensure their longevity and your comfort. Always use gentle pressure when removing or placing your dentures to avoid bending or breaking them. Here are some steps to follow for safe removal and placement:


  • Stand over a folded towel or a sink filled with water to cushion the dentures in case they slip from your hands.
  • Use both hands to evenly grasp the dentures when removing them from your mouth.
  • Gently rock the denture back and forth to break the seal before lifting it out.
  • When placing the dentures back, ensure that they are correctly aligned with your gums before applying gentle pressure.


Remember, never force your dentures into place as this can cause damage to both the dentures and your gums. Instead, if you're having trouble, consult your dentist to check for proper fit.


Storing Dentures in Water When Not in Use


Proper storage of your partial dentures when they are not in use is essential to maintain their shape, fit, and cleanliness. Always submerge your dentures in water to prevent them from drying out and warping. This simple step ensures that your dentures will be comfortable to wear and will fit properly when you put them back in.


It's important to note that while water is suitable for short-term storage, it does not disinfect or clean your dentures. For longer periods, such as overnight, consider using a denture cleaning solution to keep your dentures free from bacteria and odor.


Remember to change the water or cleaning solution daily to maintain a hygienic environment for your dentures. Avoid using hot water as it can cause the dentures to warp. Here's a quick checklist for denture storage:


  • Use a clean container with a secure lid to prevent contamination.
  • Fill the container with enough water or denture cleaning solution to fully cover the dentures.
  • Change the storage solution daily to ensure cleanliness.
  • Keep the storage container in a safe place, away from pets and children.


Avoiding Extreme Temperatures and Harsh Chemicals


Proper handling and storage of partial dentures are essential to prolong their lifespan and maintain their structure. Always handle your dentures with care to prevent accidental drops that could cause cracks or breakage.


When storing your dentures, it's crucial to keep them moist to prevent them from drying out and losing their shape. Here's a simple guideline for storage:


  • Always place dentures in water when not in use.
  • Use a denture soaking solution overnight for additional cleanliness.
  • Ensure the water is at room temperature; extreme heat can warp dentures.


Avoid using hot water for soaking or cleaning, as it can cause the dentures to warp. Similarly, exposing dentures to freezing temperatures can make them brittle and prone to damage.


Lastly, refrain from using harsh chemicals, such as bleach or abrasive cleaners, which can damage the denture material. Stick to recommended denture care products to ensure safety and effectiveness.

Frequently Asked Questions

  • How often should I clean my partial dentures?

    Clean your partial dentures multiple times a day with unscented soapy water to maintain oral hygiene.

  • Can I use regular toothpaste to brush my partial dentures?

    No, regular toothpaste can be abrasive. Use unscented soapy water for brushing your partial dentures.

  • How do I remove stains from my partial dentures?

    Soak your dentures in a vinegar solution once a month for 5-10 minutes or use denture-specific cleaning tablets to remove stains and debris.

  • Should I remove my partial dentures at night?

    Yes, remove your dentures every night before bed and place them in water to let your gums rest and keep the dentures hydrated.

  • How do I store my partial dentures when I'm not wearing them?

    When not in use, store your dentures in water or a denture cleaning solution to keep them hydrated and clean.

  • Is it necessary to visit a dentist for partial denture maintenance?

    Yes, regular visits to a professional, such as Impressive Smiles, are recommended for deep cleaning and to ensure your dentures fit properly.

September 11, 2026
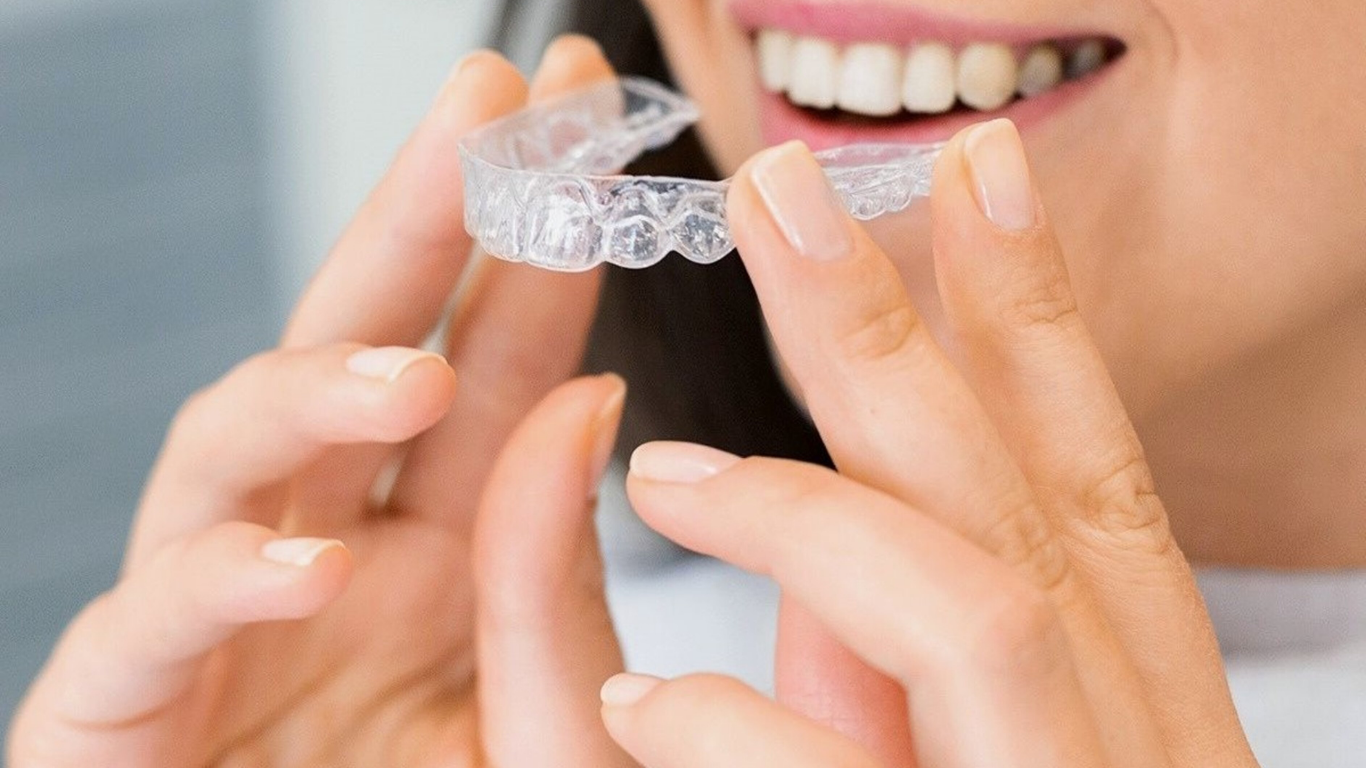
Here's the reassuring part first: in the vast majority of cases where Invisalign seems to have stalled, stopped tracking, or is running behind schedule, the fix is a refinement, not a restart. It's a genuinely annoying moment, watching a treatment you've stuck with for months seem to stop cooperating for no clear reason. But "not working as expected" covers a wide range of situations, from a single tray that won't seat flush to a timeline that's quietly slipped by six weeks, and most of them have a clear explanation and a straightforward next step. Invisalign works by using a series of custom, removable clear aligners, each slightly different from the last, to apply gentle, continuous pressure that gradually moves teeth into a planned position over roughly one to two weeks per tray. When that process doesn't go as expected, it's almost always tied to how consistently the aligners are worn, how well a given tray is tracking, or a plan that needs a mid-course adjustment. Quick Answer: Loose-fitting trays, teeth that seem stuck, or a schedule that's fallen behind are usually wear-time or tracking issues, not treatment failure. A dentist typically resolves this with a refinement: new scans and a short new series of aligners to finish the movement the original plan didn't quite complete. Key Takeaways Mild pressure for the first one to three days of a new tray is normal and means the aligner is doing its job. A tray that won't snap flush against your teeth after a couple of weeks is the clearest sign something's off. Not wearing aligners the full 20 to 22 hours a day is the single most common reason treatment slows down. A refinement means new scans and a short new set of aligners, not starting the whole plan over. Lost or loose attachments, the small tooth-colored bumps some plans use, can quietly stall how well a tray fits. Teens still growing sometimes need their plan reassessed partway through, which is normal rather than a sign anything went wrong. How Invisalign Is Supposed to Work Invisalign starts with a digital scan of your teeth, which gets turned into a 3D treatment plan mapping out exactly how each tooth needs to move, in what order, and over how many stages. From that plan, a lab produces a full series of clear aligner trays, each one a small step closer to the final position and each slightly different from the one before it. You wear one tray for about one to two weeks, then move to the next, and the plastic itself applies gentle, continuous pressure that encourages the bone around each tooth to remodel slowly around the new position. It's a slower process than traditional braces by design. That gradual pace is part of what makes it more comfortable and lets you keep wearing removable trays instead of fixed brackets and wires. For it to work the way it's planned, though, two things have to hold true: you need to actually wear the trays close to the full recommended 20 to 22 hours a day, and each tray needs to seat fully, or "track," before you move to the next one. When either of those breaks down, that's when people start to feel like Invisalign isn't working. What "Working" Actually Feels Like, Week to Week A new tray typically feels snug, sometimes a little too snug, for the first one to three days. That tightness is a good sign. It means the tray is applying pressure to teeth that haven't caught up to that stage yet. By day three or four, most people stop noticing it entirely, and the tray should sit flush against every tooth with no visible gap. That's the pattern to expect roughly a dozen times or more over the course of treatment: tight for a couple of days, comfortable and fully seated after that, repeat. If a tray still doesn't fit flush by the end of its second week, or the discomfort doesn't ease up at all, that's outside the normal pattern and worth mentioning at your next check-in rather than waiting. The Real Warning Signs Something's Off The Tray Won't Seat Flush Against Your Teeth This is called poor tracking, and it's the clearest physical sign that a tray isn't doing its job. You'll usually see it before you feel it: a visible gap between the aligner's edge and the tooth, especially near the back molars or along teeth that are rotating rather than just sliding. Poor tracking on one tray tends to compound, since each aligner is built assuming the tooth reached its target position in the tray before it. If tray four didn't fully seat, tray five is starting from a slightly different place than the plan expected, and the gap can widen from there rather than close on its own. Your Teeth Haven't Visibly Moved Since Your Last Check-In Progress with Invisalign is gradual, so this one takes a little patience to judge fairly. But if you're several trays into a stage and comparing photos shows genuinely no change, or a tooth that was supposed to be rotating looks exactly the same as it did a month ago, that's worth flagging. Sometimes it's simply a slower-moving tooth catching up to the rest of the plan. Sometimes it means a tray isn't tracking well enough to actually be moving that tooth at all. You're Consistently Behind the Planned Schedule Most Invisalign plans come with an estimated total timeline and a rough number of trays. Falling a tray or two behind because of a busy week is common and rarely matters much. Falling weeks behind, repeatedly, is a different story, and it's almost always tied back to wear time rather than anything wrong with the plan itself. If your original estimate was ten months and you're now six weeks past that with several stages left to go, that gap is worth a direct conversation rather than pushing forward and hoping it closes on its own. An Attachment Fell Off and You Didn't Notice Right Away Many Invisalign plans use small, tooth-colored composite bumps called attachments, bonded directly onto certain teeth, which give the aligner tray something to grip for more complex movements like rotation or extrusion. They're durable, but they can pop off, especially from chewing something hard or sticky. A missing attachment doesn't always hurt or feel obviously different, which is exactly why it can go unnoticed for a week or two while that particular tooth quietly stops moving as planned. If a tray suddenly feels different on one specific tooth compared to the rest of your mouth, running your tongue over that spot is worth doing. The Most Common Reason Treatment Stalls: Wear Time If there's one answer behind most "Invisalign isn't working" situations, it's this one. The 20-to-22-hour daily wear recommendation isn't a suggestion with room to spare; it's closer to a floor than a target. That leaves two to four hours a day for eating, drinking anything besides water, and brushing and flossing, combined. It's easy to underestimate how quickly that adds up: a long lunch, a coffee sipped slowly through the afternoon, forgetting to pop the tray back in after brushing before bed. Miss even three or four hours a day, every day, and a tray that was supposed to fully seat within two weeks might not get there at all before the next one is due. The math is unforgiving in a way that traditional braces, bonded permanently to the teeth, simply aren't. It's also the single most fixable cause on this entire list, since it's the one within a patient's direct control. What a Refinement Actually Involves When a treatment plan needs to catch up or fine-tune a few remaining movements, most dentists reach for a refinement rather than restarting from the beginning. That means a new digital scan of your teeth as they currently sit, not as they sat at the original consultation, and a new short series of aligners built to finish the specific movements the first series didn't quite complete. Refinements are a normal, planned part of Invisalign treatment for a meaningful share of cases, not a sign that something went unusually wrong. Depending on how much correction is needed, a refinement series might run anywhere from a handful of trays to a couple of months' worth. The wait time to get a refinement scanned, fabricated, and back in your hands is typically a few weeks, worth factoring in if you're trying to plan around a specific event like a wedding. Teens, Growth, and a Question Worth Asking at Your Next Visit Teen patients bring an added variable that adult cases don't: ongoing jaw and facial growth that can shift how a treatment plan needs to unfold partway through. A plan built at the start of treatment sometimes needs a genuine reassessment months in, not because anything was done wrong, but because a growing jaw isn't a fixed target the way an adult's is. How much a specific teen's plan might need to shift, and when, isn't something a general guide like this one can answer. That's a conversation worth having directly at the next check-in, especially for a patient who started treatment early in their teens rather than closer to adulthood. When to Call the Office Instead of Waiting It Out A tray that's uncomfortably tight for more than the first three or four days, one that visibly won't seat after two weeks, a lost attachment on a tooth you can feel is supposed to be moving, or a schedule that's slipped by more than a few weeks are all reasons to call rather than continue on your own. None of these are emergencies, but none of them tend to resolve by simply switching to the next tray and hoping for the best either.  Frequently Asked Questions (FAQs)
September 11, 2026
Two days after Maria's new crown went in, she still couldn't chew on that side of her mouth. Every bite sent a jolt straight up into her jaw, and by the third day she was eating soup for dinner and wondering if something had gone wrong. That's a frustrating position to be in, especially right after paying for a new crown. It's also one of the more common calls a dental office gets after a crown appointment: "It's fine until I bite down, then it hurts." The tricky part is that this single symptom can point to two very different problems, one a five-minute fix and one that needs real attention. A crown that hurts specifically when you bite down is usually caused by the crown sitting a fraction of a millimeter too high, a problem dentists call occlusal interference, and it's corrected in minutes by filing down the high spot. If the pain lingers after you release the bite, throbs on its own, or wakes you at night, it points instead toward an infection developing under or around the tooth. Quick Answer: Pain only while biting, gone the instant you stop, is almost always a bite adjustment issue. Pain that lingers, comes with swelling, or shows up as a small bump on the gum near the crown is a different problem and needs an exam within a day or two, not a wait-and-see approach. Key Takeaways Pain right when you bite is usually mechanical: a crown sitting slightly too high. Pain that lingers, throbs, or wakes you at night is more likely a sign of infection underneath the crown. A pimple-like bump on the gum near the crown is a fistula, meaning an infection is already draining somewhere. Left untreated, an infected tooth under a crown can develop into an abscess that spreads into the jaw. A same-day bite adjustment fixes most "hurts when I bite" complaints; an X-ray and cold test rule out infection. Waiting rarely makes this better, and it sometimes turns a simple fix into a root canal. If you're reading this with an ice pack against your jaw right now, the comparison section further down is the fastest place to find your answer. When "Hurts When I Bite" Means Something Different Maria's dentist ran through the same short list any dentist runs through when a patient reports pain tied specifically to pressure. That specificity matters. A tooth that aches constantly, whether you're biting or not, points toward the nerve. A tooth that only complains under load points toward something mechanical, at least at first. New crowns are especially prone to this because a crown is built from an impression taken before the final cement sets, and even a small miscalculation in height can leave one tooth absorbing more force than its neighbors every time you chew. The good news is that mechanical problems are the more common of the two, and they're also the easier fix. The less good news is that a crown placed over a tooth with hidden decay, a hairline crack, or a nerve already under stress can develop real trouble that happens to announce itself with the exact same complaint: it hurts when I bite. Telling the two apart from the outside is part of what an exam is for, but there are patterns worth knowing before you ever pick up the phone. Five Reasons a Crown Hurts Under Pressure 1. The Crown Is Sitting a Little Too High This is occlusal interference, and it's the single most common reason for post-crown biting pain. When a crown is cemented even slightly higher than the surrounding teeth, that tooth takes the first and hardest hit every time the jaw closes, long before the other teeth share the load. The tooth's ligament, the soft tissue anchoring it in the bone, reacts to that overload the same way a bruised toe reacts to a tight shoe: sore under pressure, quiet otherwise. Patients often describe it as a bite that "doesn't feel right," even before it hurts outright. A dentist checks this with a thin strip of colored articulating paper. You bite down, the paper marks the high spot, and a few passes with a polishing bur bring the crown back into line with the rest of your bite. 2. The Cement Has Started to Wash Out Crowns are cemented, not glued in the way most people picture. Over months or years, the thin cement layer under the crown can wear down at the margin, the edge where crown meets natural tooth. Once that seal is compromised, chewing forces flex the crown slightly against the tooth underneath, and bacteria gets a path in that wasn't there before. This tends to show up gradually rather than right after a new crown, and it's often accompanied by a faint bad taste or a crown that feels like it shifts slightly when you press on it with your tongue. 3. Decay Has Started Under the Margin A crown covers the visible part of a tooth, but it doesn't make that tooth immune to cavities. Decay can start at the margin and work its way inward without ever being visible from the outside. Because it's hidden under porcelain or ceramic, patients usually don't notice it until it's deep enough to cause sensitivity to pressure or temperature. This is one of the reasons dentists x-ray crowned teeth at routine checkups even when nothing looks wrong on the surface. Caught early, margin decay is a straightforward filling. Left alone, it can progress to the pulp and turn into the kind of infection this article keeps circling back to. 4. There's a Crack in the Tooth Underneath Teeth that needed a crown in the first place were often already compromised: a large filling, a root canal, or heavy wear from grinding. That history can leave a hairline crack in the tooth structure below the crown, one too fine to show up on a standard X-ray. Cracked tooth syndrome has a fairly specific fingerprint: sharp pain on release of a bite rather than during it, often triggered by chewing on one particular side. It's an uncomfortable diagnosis to land on because cracks like this don't always show themselves clearly, and confirming one sometimes takes a bite test with a small plastic stick pressed against individual cusps of the tooth. 5. An Infection Has Developed Inside or Below the Tooth This is the scenario worth taking seriously. If the nerve inside a crowned tooth becomes inflamed or dies, pressure while biting can aggravate a pocket of infection at the root tip. Unlike a simple high bite, an infection rarely stays quiet between meals. It tends to announce itself with throbbing that continues after you stop chewing, sensitivity to hot that lingers for a full minute or longer instead of fading in seconds, tenderness when you press on the gum near the root, and sometimes a small, soft bump on the gum that looks almost like a pimple. That bump is a fistula, and it means the body has already found a way to drain the infection on its own, which is not the same thing as the infection resolving on its own. A tooth can carry an infection like this for weeks with only mild symptoms before it flares. Telling the Two Apart Before You Call A short mental checklist helps here, even though nothing replaces an actual exam. Pain that starts the instant you bite and disappears the instant you stop usually means bite height. Pain that lingers for minutes, builds through the day, or wakes you at 2 a.m. usually means something is happening inside the tooth. Swelling anywhere along the gumline near the crown is never a bite issue; it's a sign of infection until proven otherwise. A faint, persistent bad taste on that side of your mouth, especially paired with tenderness, points toward a cement seal that's failed rather than a purely mechanical problem. And if you press gently on the gum above the tooth and it's noticeably more tender than the same spot on the other side of your mouth, that's worth mentioning specifically when you call, since it helps the front desk decide how quickly to get you in. If you've been quietly hoping this will just go away on its own, it's worth saying plainly: infections under a crown very rarely resolve without treatment. What Actually Happens at the Exam An exam for this specific complaint usually takes less time than patients expect. Dr. Drisdale starts with percussion testing, a gentle tap on the crowned tooth and its neighbors with the back of a mirror handle, comparing how each one responds. A tooth with an active infection at the root typically reacts noticeably more than the teeth around it. Cold testing follows, checking whether the nerve inside still responds normally, responds with lingering pain, or doesn't respond at all, each of which points toward a different diagnosis. Articulating paper checks bite height directly. A digital X-ray rounds out the exam, showing whether there's a dark shadow at the root tip, the classic sign of a periapical infection, or whether the bone and root look normal and the problem really is mechanical. Most patients walk in without knowing which of these applies to them and walk out with a clear answer within about twenty minutes. Treatment Depends Entirely on the Cause If it's a high bite, treatment is often finished in the same visit: a few minutes with a polishing bur and a recheck with the articulating paper. If the cement seal has failed, the crown may be removed, cleaned, and recemented, sometimes with a temporary crown in place while a new one is fabricated if the old one no longer fits well. Margin decay caught early usually means removing the crown, treating the decay like a standard filling, and placing a new crown, since porcelain crowns can't simply be patched. A confirmed infection changes the plan more significantly. That typically means root canal treatment to remove the infected pulp, followed by a new crown once the tooth has healed, since a tooth that's had a root canal is more brittle and needs that crown's protection going forward. In the rare case where the infection has caused too much bone loss to save the tooth, extraction and a replacement option, like an implant, gets discussed instead. What Waiting Does, in Plain Terms An infection under a crown doesn't stay contained forever. Left alone, it can spread from the root tip into the surrounding jawbone, and from there into the soft tissue of the face, which is how a manageable dental problem turns into an emergency room visit. That progression can take weeks or, in some cases, just days once it accelerates. It's also worth knowing that pain sometimes decreases temporarily as an infection progresses, not because it's healing, but because the nerve inside the tooth has died and stopped signaling. A quiet tooth is not the same thing as a healthy one. Protecting a New Crown Before Your Follow-Up If you're a few days out from a new crown and waiting on a follow-up appointment: chew on the opposite side of your mouth, skip anything hard, sticky, or icy on that tooth, and avoid extreme hot or cold if the tooth is sensitive. Over-the-counter pain relief can manage mild discomfort in the meantime, but it shouldn't be the plan for more than a day or two. If swelling, throbbing, or a fever shows up at any point, that's a same-day call, not a wait-and-see situation. Frequently Asked Questions (FAQs)
August 21, 2026
A dentist typically recommends a dental crown when a tooth has a large crack, extensive decay, a failing filling, or has undergone root canal treatment, since these situations weaken the tooth structure beyond what a filling can support. At Dentistry of Midland, Dr. John K. Drisdale, DMD, FAGD, examines the extent of damage, the tooth's remaining structure, and the patient's bite before recommending a crown over a smaller restoration. A dental crown is usually recommended when a tooth is too damaged, weakened, or decayed for a filling to hold up. Common signs include a visible crack, a large old filling that's failing, sharp sensitivity to hot or cold, a tooth that's finished root canal treatment, or a tooth that's simply worn down from years of grinding. Dr. John K. Drisdale, DMD, FAGD, evaluates each of these factors during an exam before recommending a crown, and this guide walks through what he's actually looking for. What a Dental Crown Actually Does A dental crown is a custom-made cap that fits over the entire visible portion of a tooth, restoring its shape, strength, and appearance. Unlike a filling, which repairs a specific damaged area, a crown covers the whole tooth above the gumline. That full coverage is what makes it the right choice when a tooth is too compromised for a smaller repair to hold up under normal biting and chewing forces. Crowns are typically made from porcelain, ceramic, zirconia, or a metal alloy, depending on the tooth's location and the patient's priorities around appearance versus durability. Front teeth often use all-ceramic or porcelain crowns for a natural look, while back molars sometimes use zirconia or metal for added strength under heavier bite pressure. Five Signs a Dentist Looks For Before Recommending a Crown 1. A Crack That Extends Below the Gumline or Into the Tooth's Structure Not every crack requires a crown. Small surface cracks, sometimes called craze lines, are cosmetic and don't need treatment. But a crack that runs deep into the tooth, especially one that reaches the pulp or extends below the gumline, threatens the tooth's structural integrity. Left alone, that kind of crack can spread with normal chewing pressure until the tooth fractures. 2. A Large, Aging Filling That's Starting to Fail Fillings don't last forever. Over years of biting and chewing, a large filling can develop small gaps at the edges where bacteria sneak in, or the surrounding tooth structure can weaken from supporting an oversized restoration. When a filling covers more than roughly half the tooth's surface, a crown is often the more durable long-term fix. 3. Sharp Sensitivity to Hot, Cold, or Pressure Sensitivity that's sharp, sudden, and tied to a specific tooth (rather than generalized sensitivity across many teeth) can indicate that decay or a crack has reached closer to the nerve. This is one of the more common reasons patients schedule an exam in the first place, and it's a signal worth taking seriously rather than waiting out. 4. A Tooth That's Completed Root Canal Treatment Root canal treatment removes the infected or damaged pulp from inside a tooth, but that process also leaves the tooth more brittle than it was before. A crown placed after root canal treatment protects the tooth from fracturing under normal use, which is why it's a standard recommendation rather than an optional upgrade in most cases. 5. Significant Wear From Grinding or Long-Term Bite Issues Patients who grind their teeth at night, a habit called bruxism, can wear down tooth enamel over years without realizing it's happening. By the time wear is visible or a tooth starts to feel different when biting down, a crown can restore both the shape and the protective function that's been gradually lost. Quick Answer: With proper care, a dental crown typically lasts between 5 and 15 years, and some last significantly longer. Lifespan depends on the crown material, daily oral hygiene, and habits like teeth grinding. Regular checkups let a dentist catch early signs of wear before a crown needs replacement. What the Crown Procedure Involves Getting a crown at Dentistry of Midland generally takes place over two appointments, though some cases may be completed sooner using same-day technology depending on the tooth and material chosen. The general steps include: Preparing the tooth. The damaged or decayed portion is removed, and the tooth is reshaped to create room for the crown to fit properly. Taking an impression. A digital scan or physical impression captures the exact shape needed for the custom crown. Placing a temporary crown. While the permanent crown is fabricated, a temporary one protects the tooth. Fitting the permanent crown. Once ready, the permanent crown is checked for fit and bite alignment, then cemented into place. Dr. Drisdale's use of advanced imaging and precise digital impressions helps ensure the final crown fits comfortably and blends naturally with surrounding teeth from the first fitting. When a Crown Isn't the Right Call Not every damaged tooth needs a crown, and a thorough exam is what separates a case that needs one from a case that doesn't. Minor chips, small cavities, and cosmetic imperfections are often better addressed with a filling, bonding, or a veneer, all of which are less invasive and preserve more of the natural tooth. Part of choosing the right dentist is trusting that the recommendation matches the actual damage, not defaulting to the most extensive (and most expensive) option. Why Experience and Credentials Matter for Crown Recommendations Deciding between a filling, an inlay, and a full crown requires judgment built on experience. Dr. John K. Drisdale, DMD, is a Fellow of the Academy of General Dentistry (FAGD), a credential that reflects extensive continuing education in restorative techniques, and a member of the American Academy of Cosmetic Dentistry (AACD). He was also named a 2024 Super Dentist for West Texas. That combination of restorative training and cosmetic expertise means a crown recommendation accounts for both the tooth's structural needs and how the final result will look and feel. Frequently Asked Questions (FAQs)
More Posts